SCU-01 · SMART CONTROL UNIT

Any appliance.
Any circuit.
One box that watches it.

You Can Be Smart turns an ordinary electrical circuit into a monitored, automated, and fire-protected smart system, retrofitted in minutes, controlled from anywhere.

Tap a state to see the unit's indicator lights respond.

WHAT IT IS

A retrofit brain for the circuits you already have

Built around the ESP32-C6 Mini, the SCU-01 sits between the mains and the appliance it's protecting. It reads real electrical telemetry, watches the room's air and temperature, and holds a relay that can cut or restore power automatically, then reports all of it to a live dashboard, wherever you are.

5
Live telemetry channels, voltage, current, power, energy, cost
2
Independent connectivity paths, WiFi cloud & Bluetooth fallback
24/7
Smoke & gas monitoring with instant SMS alerting
1
Enclosure, DIN-rail mountable, drop-in install
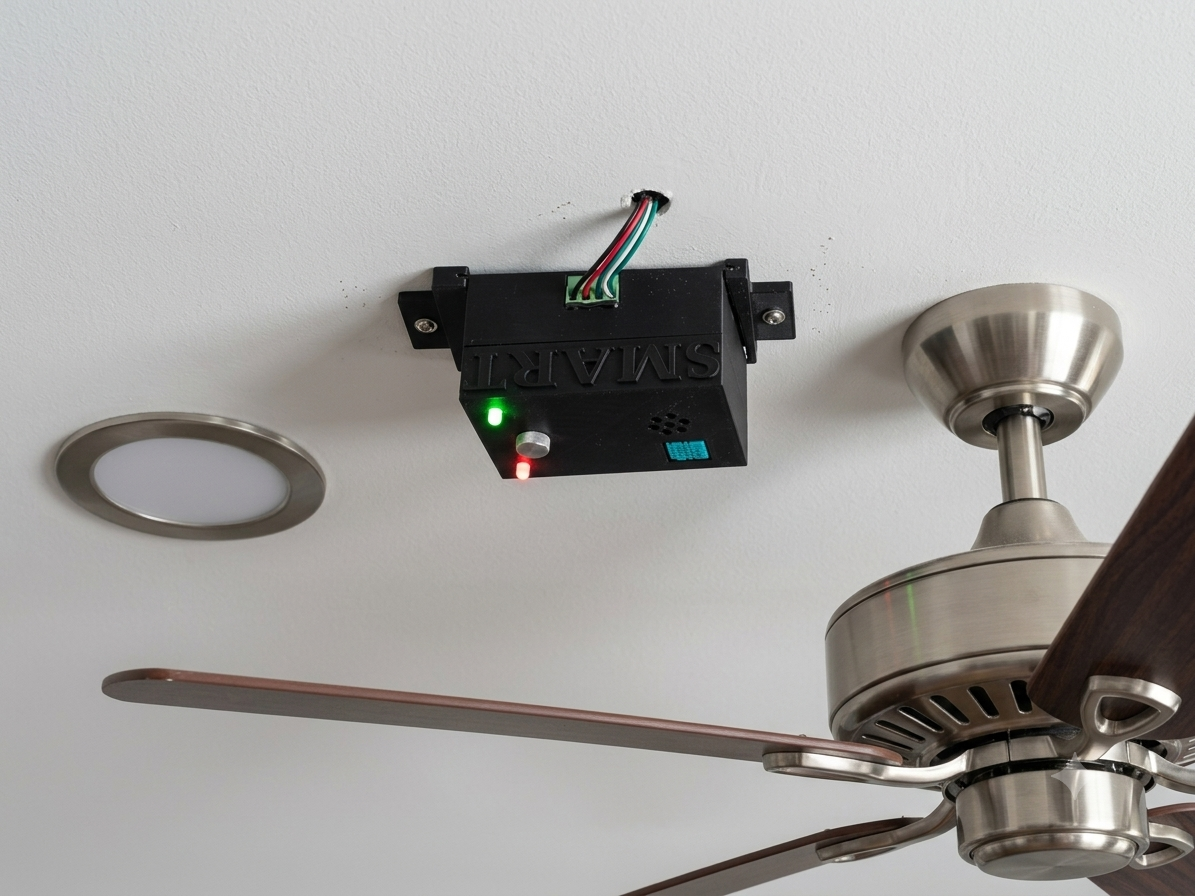
SCU-01 Smart Control Unit enclosure, showing the embossed SMART housing with red and green indicator LEDs, gas sensor vents, and temperature sensor.

CAPABILITIES

What the unit actually does

Six functions working from the same set of sensors and one relay.

Live power analytics

Instantaneous voltage, current and power, accumulated into real energy use and cost against your own tariff rate.

ZMPT101B + ACS712

Fire & gas safety

Continuous smoke and gas sampling with an emergency routine that fires the instant a threshold is crossed, no delay.

MQ-series sensor

Instant SMS alerting

The moment smoke is detected, an SMS reaches you directly over your own carrier, no app required to receive it.

IFTTT webhook

Automation and remote control

Set a comfort range once. The relay switches the load on or off automatically at your high and low limits, and you can still override it any time. or controll it using the dasboard from any part of the world.

DHT11 sensor

Dual-path connectivity

WiFi 6 to the cloud for control from anywhere, with a Bluetooth LE fallback app for the moment the internet isn't there.

WiFi + BLE

Cost-trend dashboard

A running chart of your energy cost over time, plus plain-language insights, high demand, brownout, or all clear.

Arduino IoT Cloud

WHERE IT FITS

Anywhere a circuit needs a second pair of eyes

The SCU-01 doesn't care what's downstream of it, appliance, machine, or building.

01

Homes & hostels

Fridges, water heaters and pumping systems monitored for cost and safety, with the relay ready to cut power the moment something looks wrong.

02

Rental properties

Landlords watch energy use and hazard status on shared or tenant-facing appliances without a site visit.

03

Small shops & workshops

Keep freezers, tools and equipment running in range, with real cost visibility on the electricity bill.

04

University & school labs

A teaching-grade retrofit for lab benches and demo circuits, safe to wire, safe to fail, easy to reset.

05

Unstable-grid environments

Brownout and overvoltage detection protects sensitive equipment where mains supply isn't always dependable.

06

Off-site & unattended equipment

Water tanks, gates, and outdoor loads controlled remotely, with a Bluetooth fallback if the site loses signal.

GETTING STARTED

Installing your SCU-01

Six steps from unboxing to a live dashboard.

!

This unit connects directly to mains voltage. Always switch off power at the breaker before wiring anything into the source or load terminals. If you're not comfortable working with live AC wiring, have a qualified electrician handle steps 1–3.

01

Mount the unit

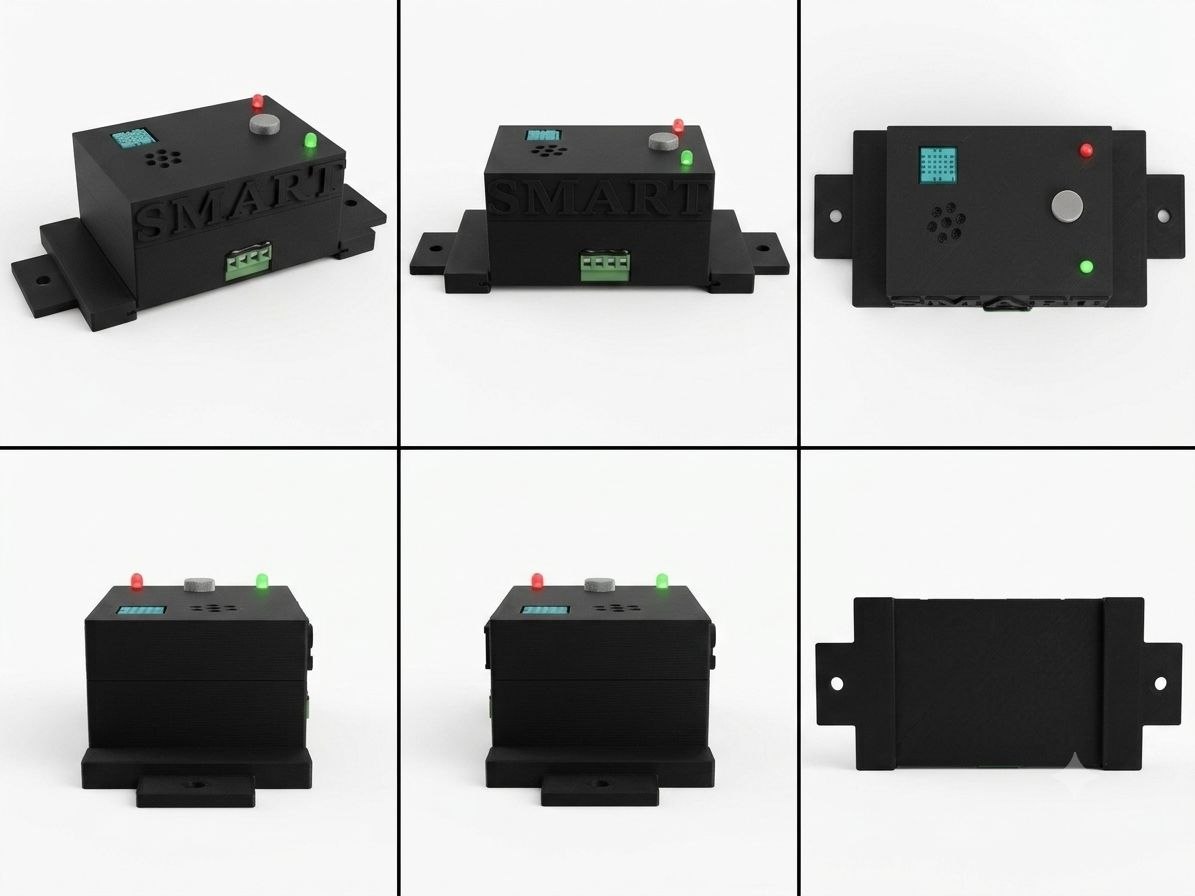
Clip the enclosure onto a DIN rail, or use the two mounting tabs to screw it directly to a wall or panel, close to the circuit it will control.

SCU-01 unit shown from multiple angles including the DIN rail mounting tabs.
02

Wire the power input

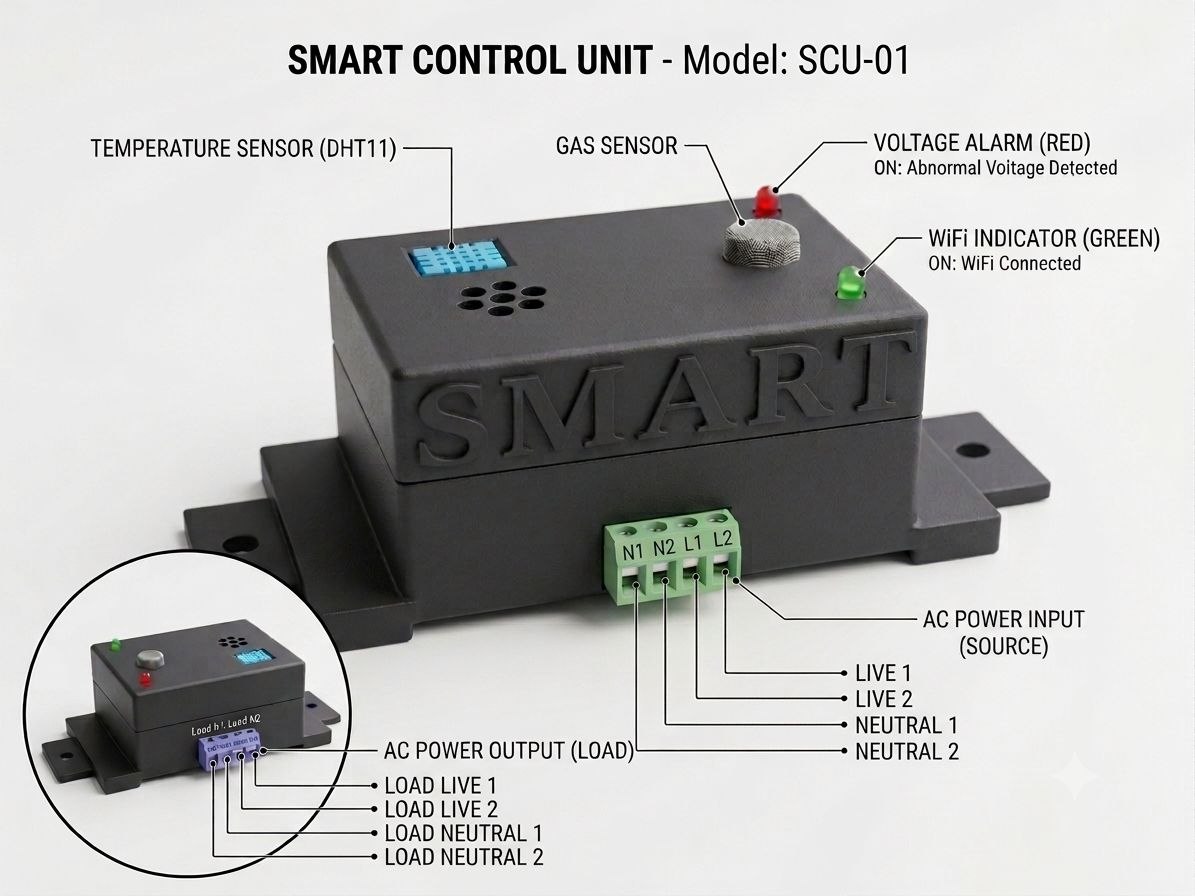
With the breaker off, connect your mains source to the L1 / L2 live and N1 / N2 neutral input terminals on the front of the unit.

Annotated diagram of the SCU-01 showing AC power input terminals L1, L2, N1, N2 and the load output terminals.
03

Wire the load output

Connect the appliance or circuit you want to monitor and control to the load output terminals on the underside of the unit.

LOAD LIVE 1appliance live
LOAD LIVE 2appliance live
LOAD NEUTRAL 1appliance neutral
LOAD NEUTRAL 2appliance neutral
04

Power on & connect

Restore power at the breaker. The unit boots and looks for your WiFi network. Once connected, the green indicator lights solidly. No network nearby? Open the companion app over Bluetooth instead.

GREEN LEDWiFi connected
RED LEDabnormal voltage
NO SIGNALuse Bluetooth app
05

Set your preferences

On the dashboard, enter your electricity tariff rate and set a comfort temperature range. The relay will use these to automate the load, and you can always override it manually.

TARIFF RATEyour local rate
HIGH LIMITe.g. 40°C
LOW LIMITe.g. 15°C
06

You're live

Monitor voltage, current, cost, and hazard status from the dashboard or Google Home, anywhere you have signal, and get an SMS the instant something needs attention.

DASHBOARDArduino IoT Cloud
VOICEGoogle Assistant
ALERTSinstant SMS

TEAM SMART

Built by two engineering students at UENR

University of Energy and Natural Resources, one project, two disciplines.

AP

Awabilla Philip

Co-inventor — hardware & firmware
B.Sc. Electrical & Electronics Engineering · UENR
NA

Naadu Addico

Co-inventor — cloud & app integration
B.Sc. Computer Engineering · UENR

NEED A HAND?

Get in touch with Team Smart

Questions about installation, a unit for your own project, or something not working right — reach us directly.